Lost Wax Casting
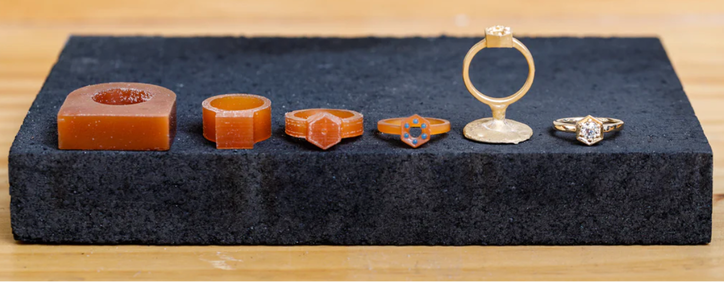
Carving Wax
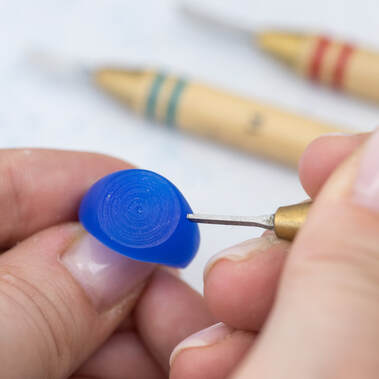
If you can think it and carve it. It can be made. Even with CNC machines taking over things their is still something about be handcarved versus it being made by a computer.
There are many ways you can carve wax, how you get there doesn't really matter if you are happy with the design.
We will be using hand tools such as saws, files, dental tools and soldering irons in order to make our creations.
You can choose to make a ring or a pendant it is your choosing.
There are many ways you can carve wax, how you get there doesn't really matter if you are happy with the design.
We will be using hand tools such as saws, files, dental tools and soldering irons in order to make our creations.
You can choose to make a ring or a pendant it is your choosing.
|

|
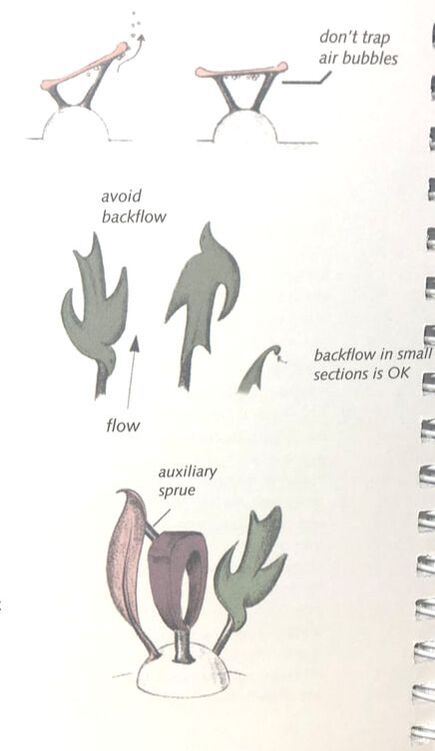
Sprues
Sprue Placement
1. Attach sprues to the thickest section of your model.
2. Connect sprues where they will not damage surface textures, and where they can be easily removed after casting.
3. Supply each thick section of the model through it's own sprue.
4. Thin sections, especially those away from the center of the model, may need separate sprues.
|
Your model should have
3/8" clearance on all sides & a minimum of an 1/2" for the top wall to avoid blowout situations. If multiple models in one investment they should be at least 1/8" apart. |

|
|
Flat models should never be horizontal. A tilted model forces the metal to ricochet along the cavity walls, which fills the the cavity more completely. The model should be entirely "downstream from the metal's entry" Think of how the metal is going to flow with the least amount of resistance. 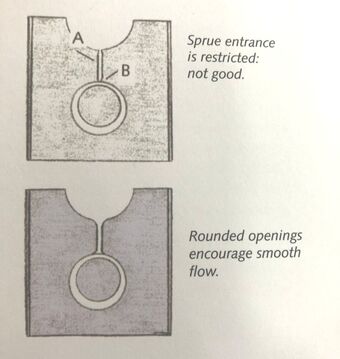
|
Determining the Amount of Metal Needed
Here comes the Math:
We need to measure our wax with it's sprues.
We then add about 10 pennyweightsper model for the button
then we multiply the weight of the model by the specific gravity of the metal being used.
So for silver we will multiply it with 10.5
Model weight + 10 Pennyweights x10.5 = The amount of silver needed.
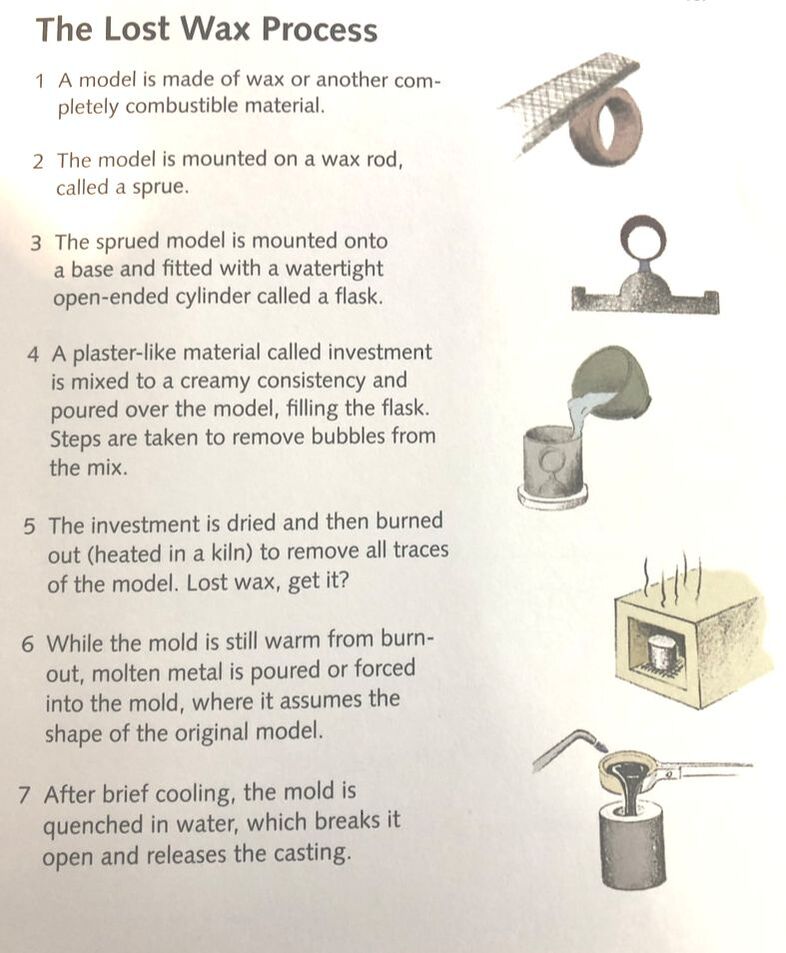
Investing, Burnout & Casting
Now it is time to mix investment, pour and cure.
Burn the wax out.
Cast the metal.
Check out the video below for the process.
Burn the wax out.
Cast the metal.
Check out the video below for the process.