Welding
We are going to cover Stick Welding & MIG Welding in this Unit:
So just what is welding?
It is the process of joining materials using Heat.
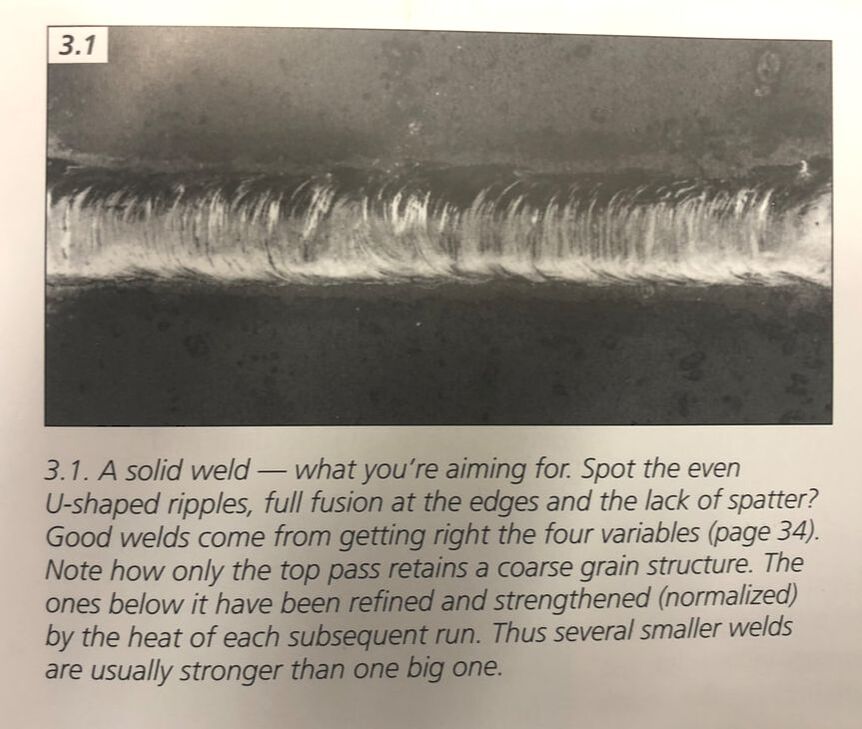
Achieving Fusion and Penetration is the key to sound work in any welding process.
So just what is welding?
It is the process of joining materials using Heat.
Achieving Fusion and Penetration is the key to sound work in any welding process.

|
|
Stick Welding / MMA (Manual Metal Arc Welding)
Keys to Successful Welding
-Support Yourself & Relax
-Be Patient
-Practice
-Use the 4 Variables
-Keep it Clean (Dirty Metal will not weld well)
-Use a weaving Pattern for Stronger Welds
-Don't weld anything smaller then an 1/8" with MMA, it will just melt
-Be Patient
-Practice
-Use the 4 Variables
-Keep it Clean (Dirty Metal will not weld well)
-Use a weaving Pattern for Stronger Welds
-Don't weld anything smaller then an 1/8" with MMA, it will just melt
Safety
-You Must wear Safety Glasses under your welding helmet
-A helmet Approved must be worn while welding, if not the electronic Arc can permanently damage your eyesight, if it is auto darkening make sure that it is working properly before welding.
-It is your responsibility to shield welding from others around you.
-Never look at someone welding!
-You must overlap pants over shoes, wear long sleeves and wear leather gloves to avoid sun burns and physical burns.
-Proceed with Caution, Parts will be extremely hot after welding
-Never weld in damp or wet places
- Never weld galvanized or painted Metal, it will release toxic fumes that will kill you.
- A voltage that is too high can be very dangerous
- Make sure that all of your body is covered including your ears
-Whenever you are unsure about anything or something does not seem right it is your responsibility to check with your instructor immediately.
Getting Started
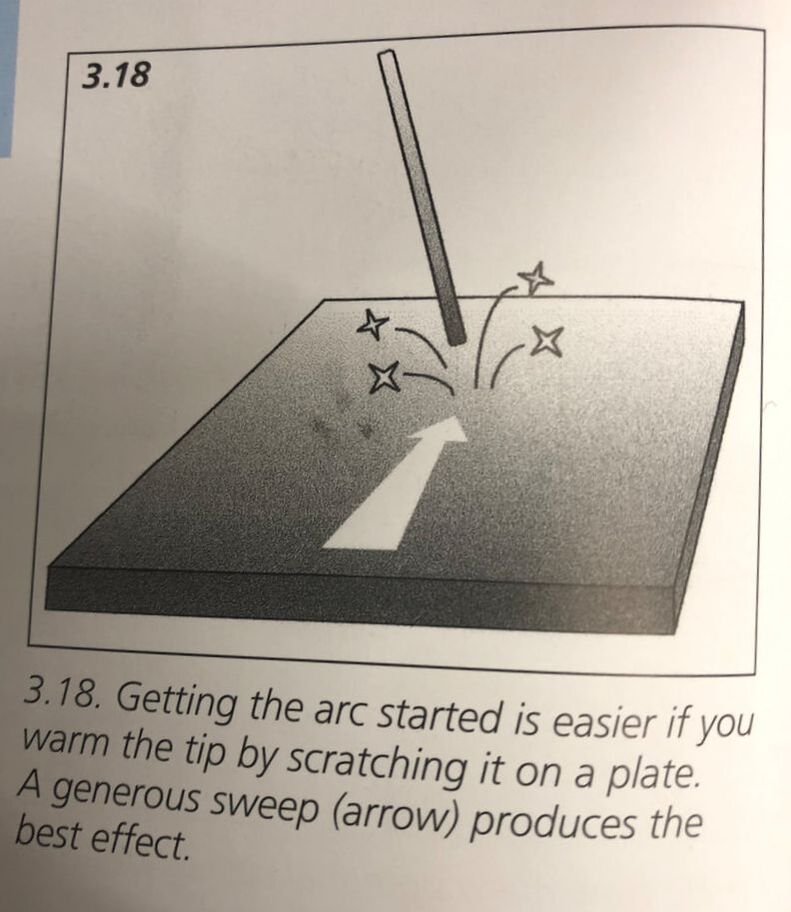
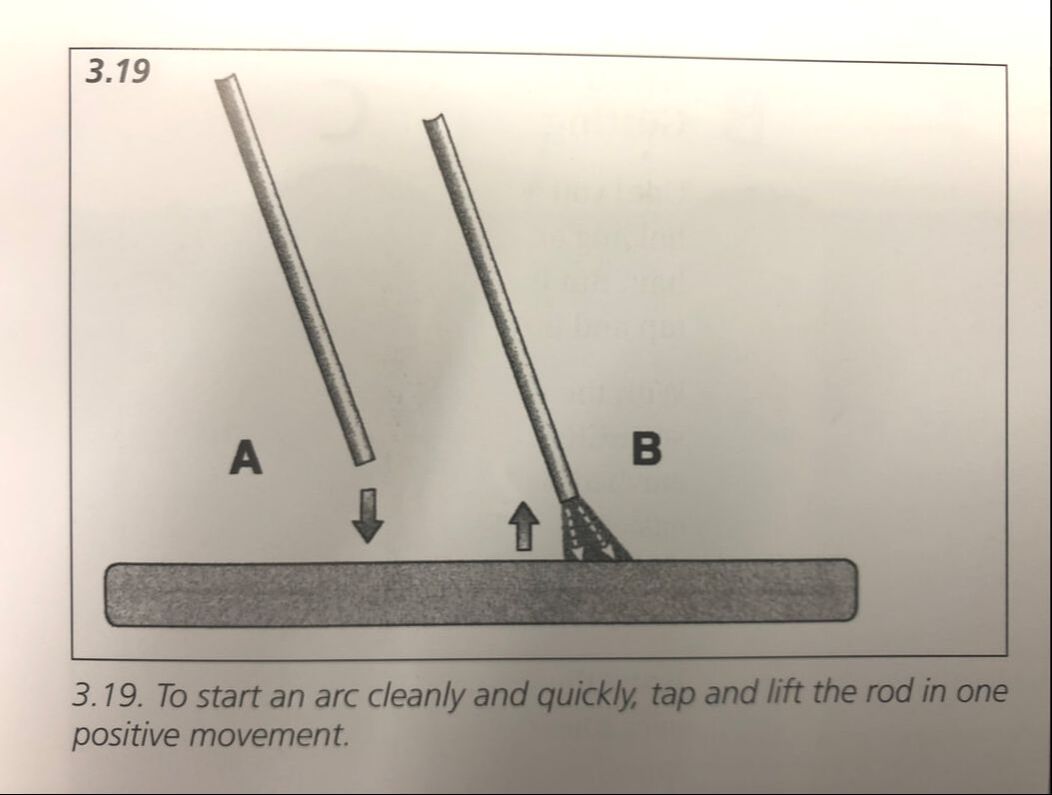
Scratch, Tap and Lift
Be Patient, Until you get used to it, Striking and Holding an Arc can have you tearing out your hair.
Be Patient, Until you get used to it, Striking and Holding an Arc can have you tearing out your hair.
|
|
The Four Variables
Current
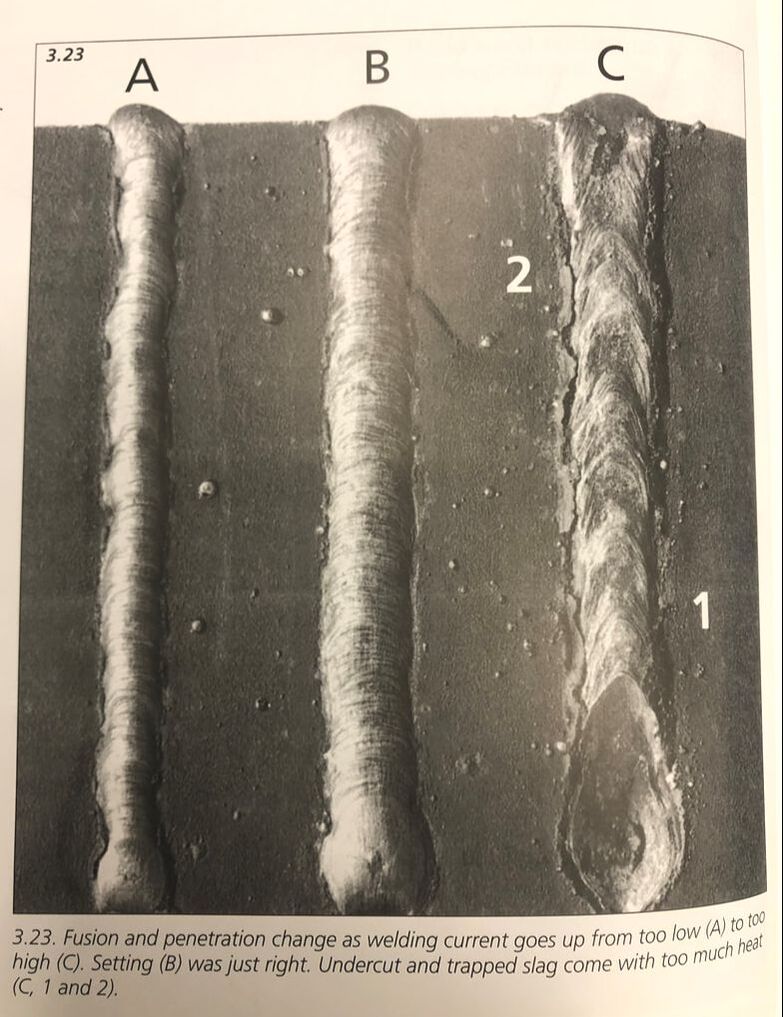
If you do not get the current right, you will not have correct Penetration & Fusion.
You will eventually learn to see, hear and feel how the rod is running, you will be able to monitor the the rod tip and alter current accordingly to gain successful weld.
Use Rod Pack's information, setting toward the upper end of the recommended range.
If Rod Packet is missing; Allow 40n amps per mm rod diameter.
A little too much current is better than not enough. But don't go overboard you will waste rod, create undercut, risk burning through and porosity, cover the job in spatter and increase distortion. To top it off the rod's flux coating will break down.
Arc Length
A good arc has a clear, bright area under it, bordered by a semi-circular curtain of molten slag behind.
You will no when your arc length is right, it's noise hardens from a soft fluttery sound (your arc is too long) to a crisp crackle as the right length is found.
A good length arc sounds like bacon sizziling in a pan.

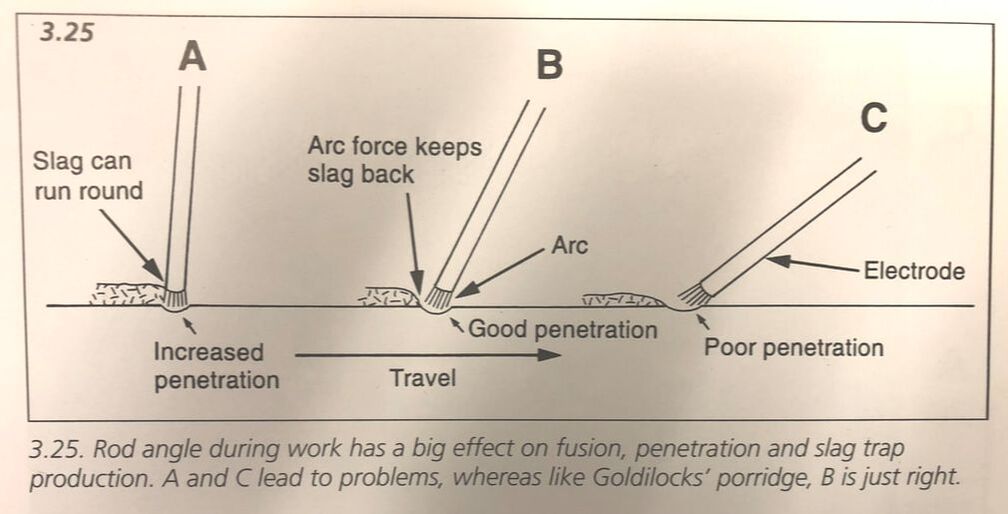
Rod Angle
Too shallow an angle will let the arc push weld metal along the works surface, so you will not have good fusion and penetration.
Too steep on an angle risks molten slag running around the rod tip to interfere with arc causing slag traps.
Therefore the right rod angle is a balance between these two.
For most flat work about a 70 Degree angle is right.
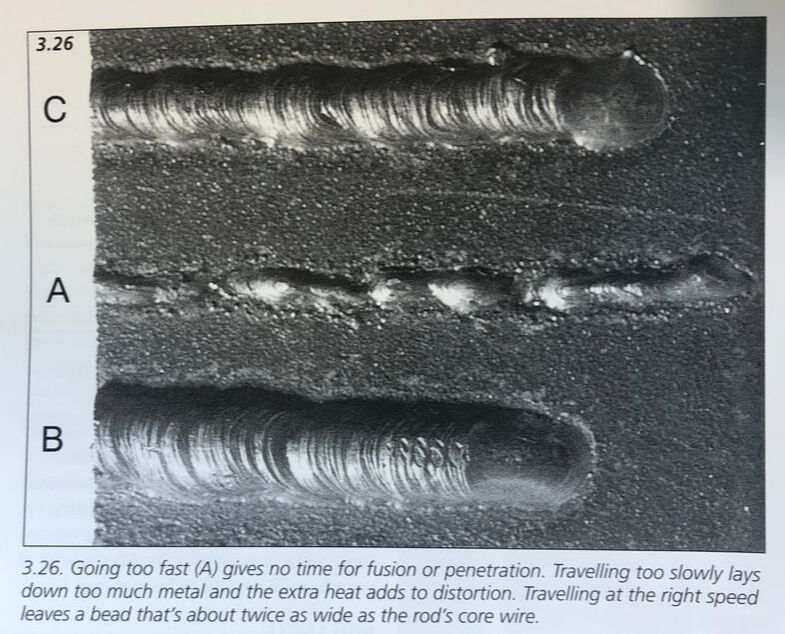
Speed of Travel
Speed needs to be constant
Going too fast: leaves no time for the weld metal to be deposited, so the bead will be stringy and weak.
Going to slow: Takes longer, wastes rod and increases distortion and leaves humped deposit.
The Right Speed: Leaves a neat, even bead roughly twice as wide as the electrode core wire.
The Key of making a long-lasting, safe weld is good preparation.
Invest time in removing crud and aligning parts, and grinding and cleaning.
It's always time well spent.
Do's & Don'ts
|
|
|
|
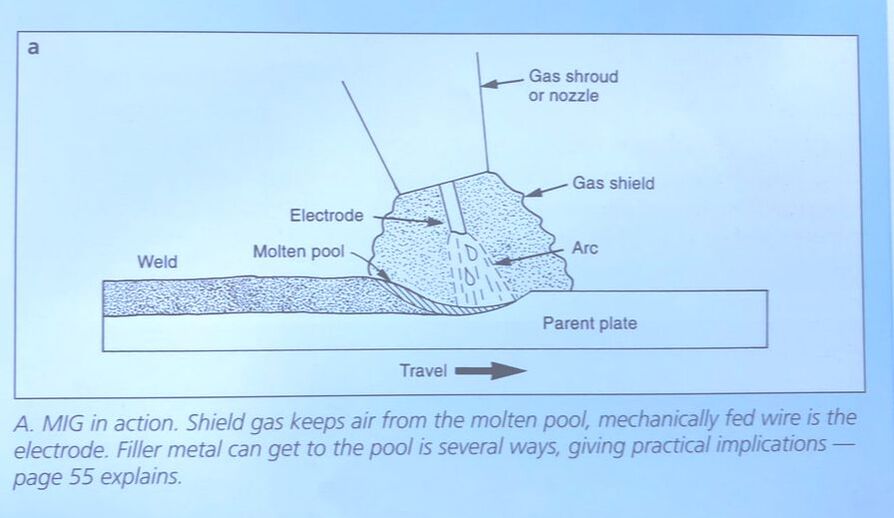
MIG Welding
MIG is shorthand for Metal Inert Gas, So what is MIG welding? It's an arc welding process in which the stick electroide is replaced by continuously fed wire, and where a shield gas takes over from an electrode's coating.
The Differences from MMA & MIG
-MIG is always a DC process
-The operator is not in manual charge of arc length. this is changed by altering voltage at the set.
-Current is adjusted indirectly by altering wire feed speed.
-Travel is substantially faster and the gun is usually pushed, not pulled.
-There's effectively no help from the flux.
The Same Constant as all welding is
Penetration & Fusion
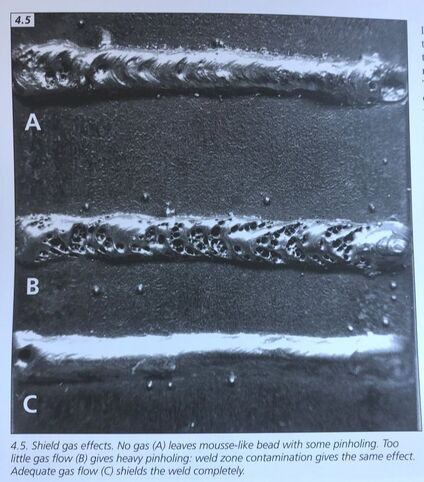
Having Adequate gas flow is essential....
Check your tips, they need to be changed, they are cheap and don't last forever.
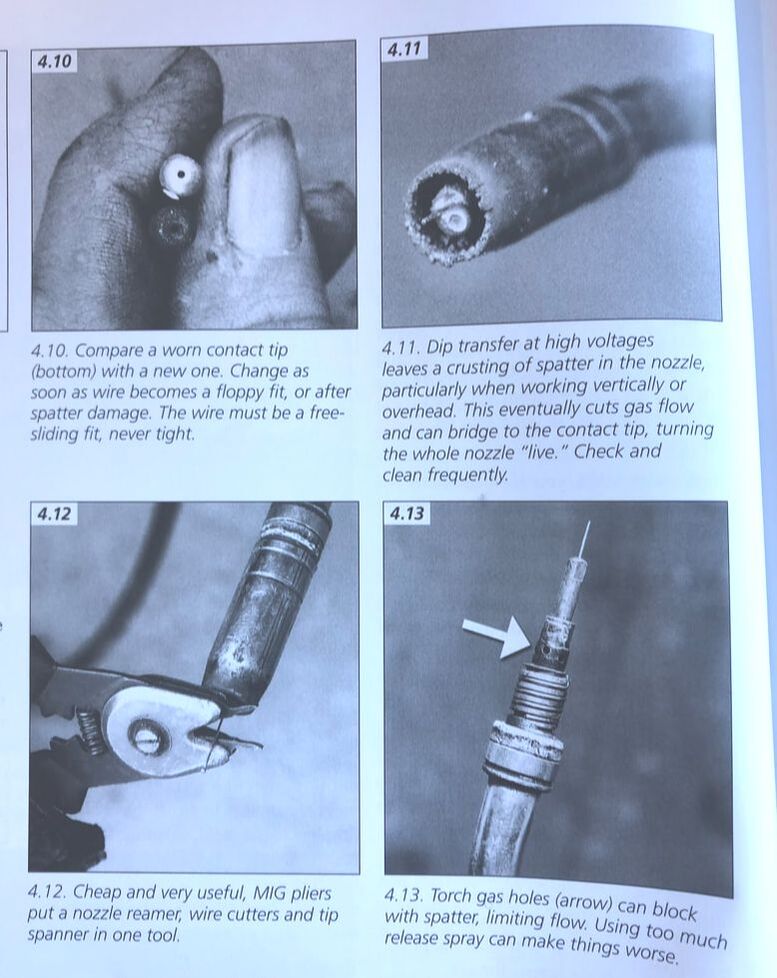
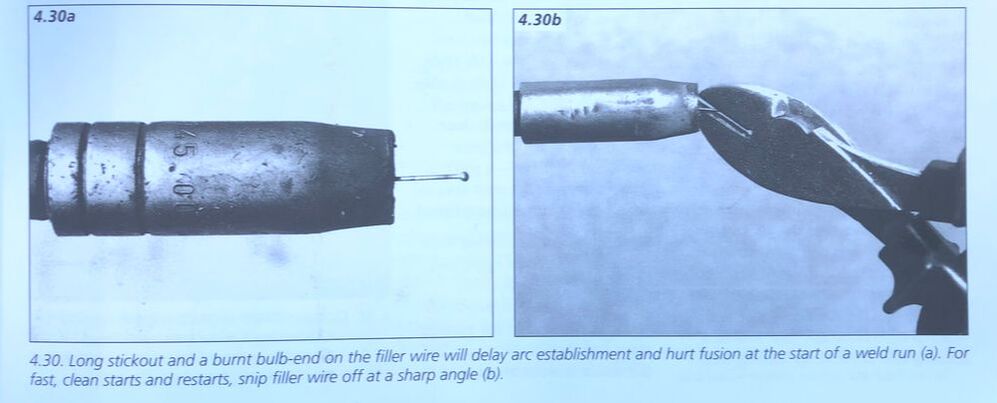
Clip your wire, you will get cleaner starts
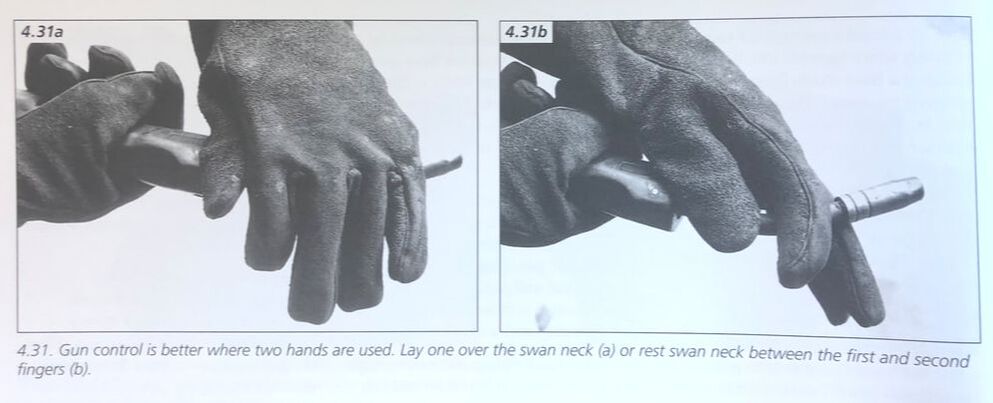
Use two hands, it will be more stable. You will get better welds
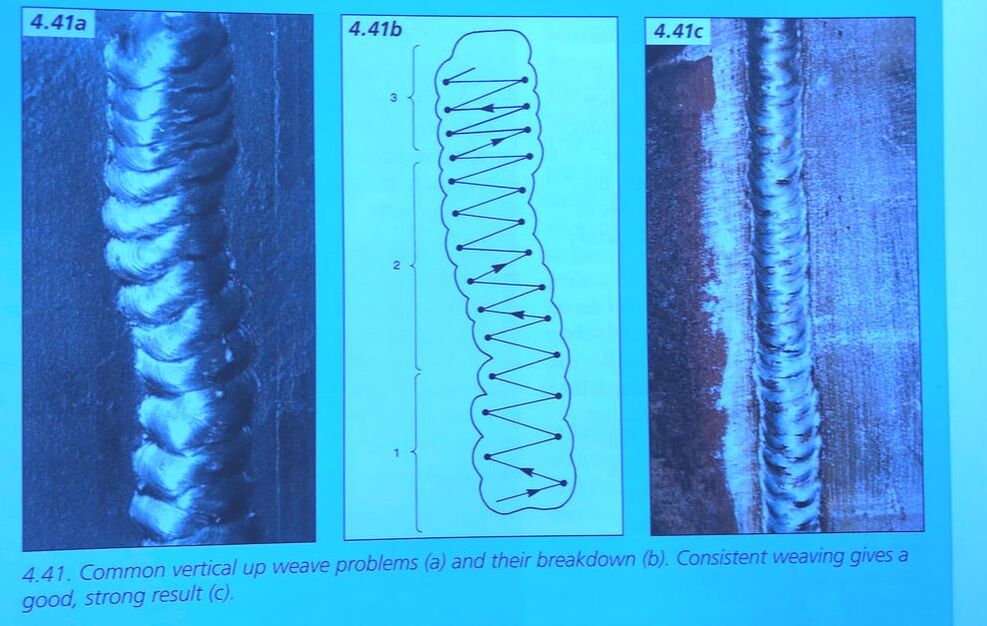
Do a weaving pattern, it will make better welds
Your Mission:
You are to create multiple weld samples
Your 1st weld sample will be simple beads using the Stick and MIG Welders
Once you are confident with your bead, you will have the instructor inspect your weld, if approved you will receive your welding approval and sticker from the instructor.
Your 2nd sample will be to use a joinery method, you will weld 2 pieces of metal together.
Make sure to document both samples and post them to your online portfolio.