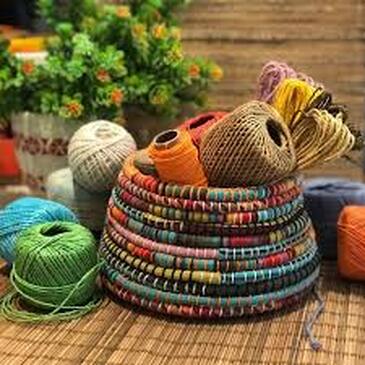
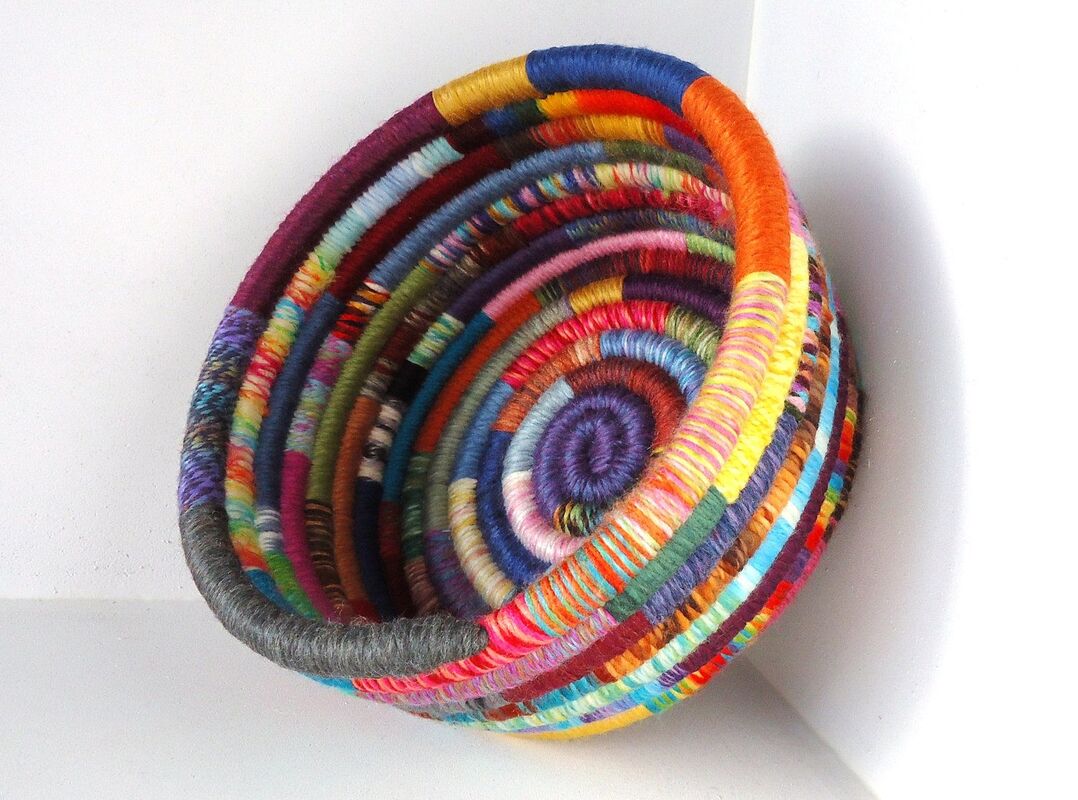
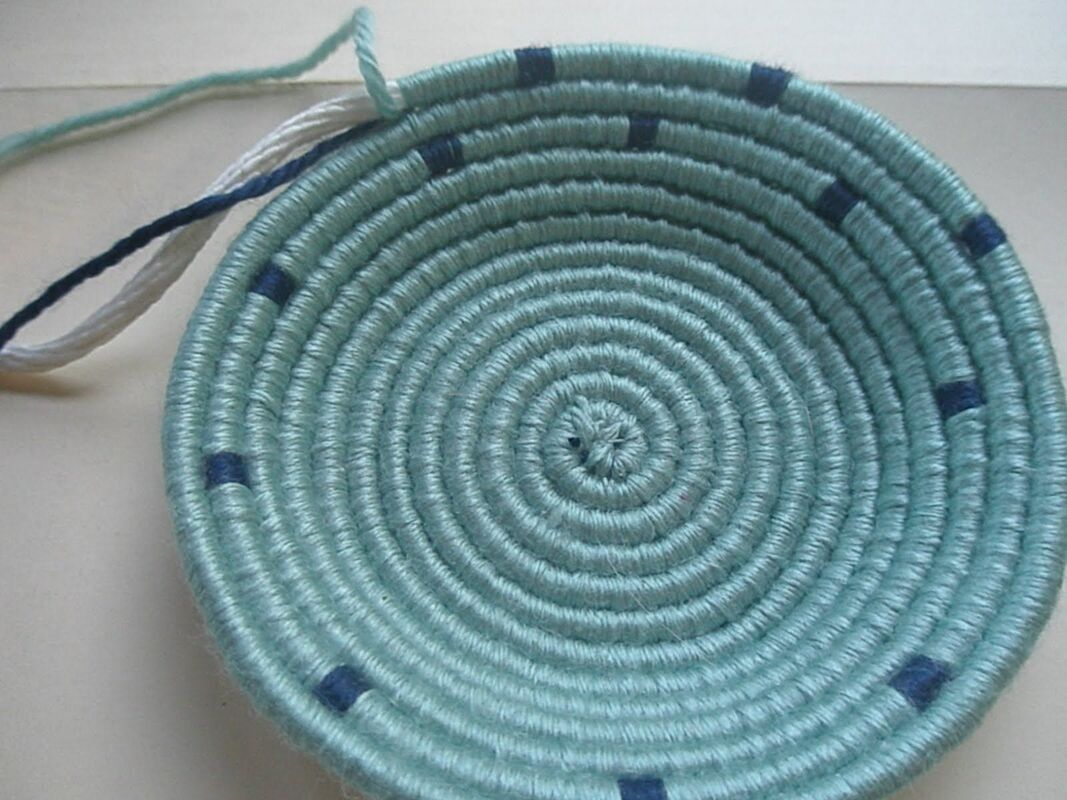
SVHS ART & CAREER TECH
Mr. Anderson's Classes
  • Metals
    • Sample Bio Page >
      • Turn in your work
    • Shop Safety
    • Aluminum Can Project
    • Wrought Iron Trivet
    • How to Read a Tape Measure
    • Copper Cuffs
    • Sheet Metal Tool Caddy
    • Welding >
      • Types of Welds & Joints
      • Scrap Metal Sculptures
      • Welded Rose
    • Blacksmithing
    • Lost Wax Casting
    • Sandcasting
    • Lathe & Mill Operation & Safety >
      • Winestopper
      • Milling Aluminum Dice
  • 3D Design
    • Sketchbook Cover
    • Sample Bio Page >
      • Turning in your work
    • Plates
    • Pottery : Bowls
    • Mugs
    • Totem Poles
    • Research Artist Page Example >
      • Editing Twitter Template
      • Timeline Examples
      • Places to find information on Artists
    • Cardboard Sculpture
    • Fabric Monsters
    • Figurative Sculpture
    • Tea set
    • Busts
    • Environmental Art
  • AP Art
    • Summer Assignment
    • Setting Up your Weebly >
      • Turning in your weebly to goole classroom
      • Sample Bio Page
      • Documenting Artwork
  • The Art of Tattoo

Yarn Coil Baskets

Picture

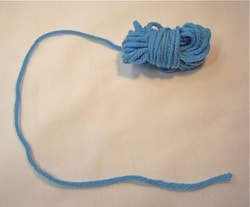
​Using the items provided in your bag:
Yarn
Clothesline
Blunt Needle (Taped to outside of your sewing kit)

You will create a Yarn coil bowl
Get Creative with it, stylize it and make it your own.

You will be graded on
Craftsmanship
Creativity
​Effort
Picture

Instructions

Picture
  • Cut a long length of cord
Picture
  • Cut the end on a diagonal
Picture
  • Get a long length of yarn.
  • If you like, ball it up neatly on one end (like shown) to help prevent tangles.
Picture
  • Line up 2 inches of the end of the yarn with the end of your cord.
Picture
  • Working back towards the end of your cord, start wrapping the yarn around the 2 inch section you lined up, to secure it.
  • Stop when you get to the diagonal cut.
Picture
  • Fold the end over so that the ends of the yarn wrapped section line up (like shown)
  • Make sure that you are wrapping the cord very close and tight, so that when you bend the cord, the white cord underneath the yarn does not show through.
Picture
  • Now start to wrap the thread so as to connect the diagonal cut cord to the rest of the uncovered cord (as shown)
  • Stop when you have continued wrapping the cord 1/2 to 1" past the diagonal cut.
Picture
  • Attach the other end of your yarn to a needle.
  • If you made a yarn bundle earlier, you will have to undo it now.
Picture
  • Start wrapping the end of the cord inward, to start an "e" shape (like shown)
Picture
  • Bend it in even closer, so that it is all touching in a tight spiral shape (like shown)
  • Hold this spiral tightly in place as you grab the needle on the opposite end of your string.
Picture
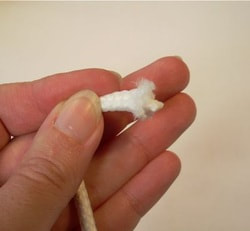
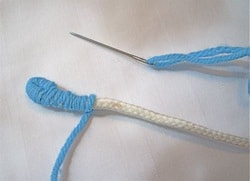
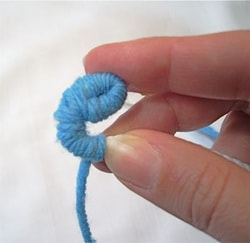
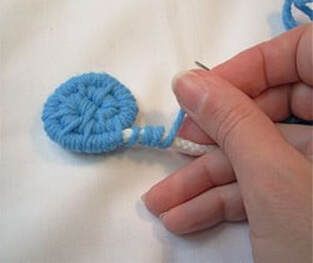
We’re going to anchor this little coil now. You do this by passing your needle through the coil above, as shown.
Picture
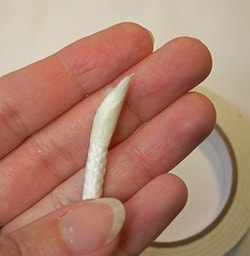
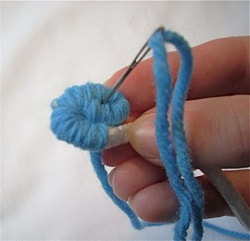
Pull the yarn all the way through (and remember, it’s several yards, so this will take a little pulling). This makes a little stitch, which anchors that coil in place.
Picture
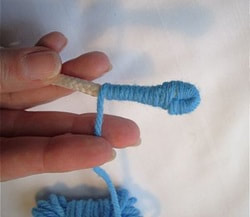
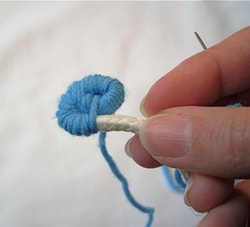
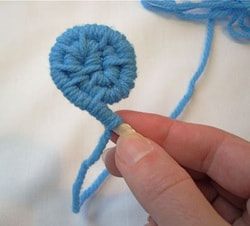
Then, you begin the repetitive part: wrap the yarn 3-4 times around the clothesline, and then take another stitch in the coil above to anchor. Wrap 3-4 more times, and then take another stitch. Easy!
Picture
  • Actually, the challenging part of this craft is yarn-management. Because you’re dealing with long lengths of the stuff, you can get kind of tangled up as you wrap it around and around.

  • Here’s how I do it: I kind of wad the yarn up, literally, wadding it up in my fist, with the needle-threaded end floating somewhere in the wad. Then, I toss this wad of yarn over the clothesline several times. That makes the loose wraps you see here . . .
Picture
Picture
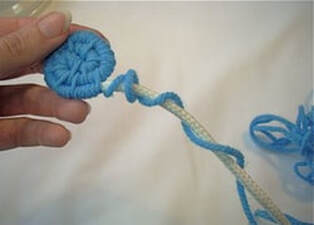
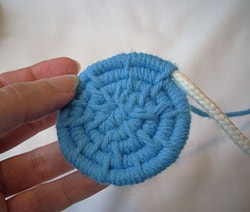
. . . And then I set that wadded yarn down, and pull and twist those loose wraps with my fingers until they’re snug. Then, I shake that wad of yarn out, find my needle, and take an anchoring stitch.
Picture
  • You can see here that, as you coil your way along, you’ll keep increasing the number of wraps you make in between those anchoring stitches. I started with 3-4 wraps for the first couple of coils. Then I went to 5-6 for the next few coils. Then I went to 6-7. This is a good place to settle in: 6-7 wraps, then an anchor stitch. You don’t want to add more wraps than this between stitches, because then your basket won’t hold together well.

  • Also, your yarn will of course get shorter and easier-to-manage as you go.
Picture
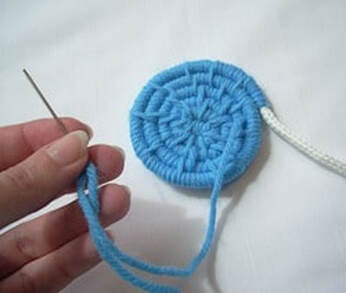
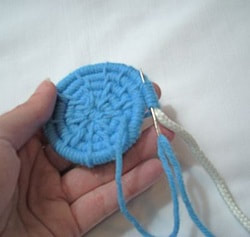
. Bet you’re wondering how to end a strand of yarn. Well, here’s how! You make one last anchor stitch, as shown here . . .
Picture
Picture
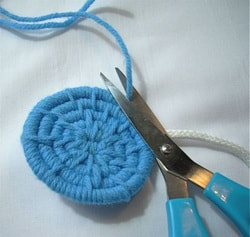
. . . And then you pass the needle under several stitches on the coil. Then, cut the end off.
Picture
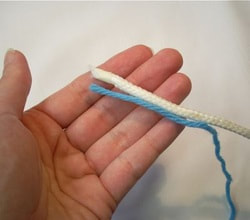
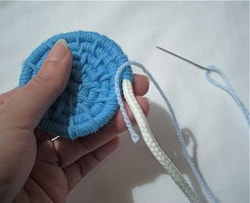
To begin a new strand (or a new color, as shown here), lay the end of the new strand along the clothesline, as shown here. Thread the other end of the strand onto a needle.
Picture
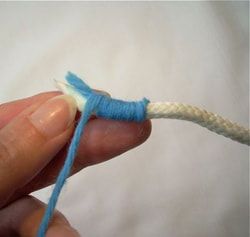
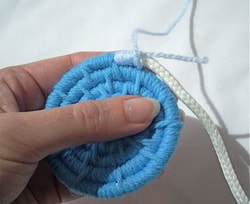
Begin wrapping with the new strand, making sure you start right up against the old strand. You’re also wrapping over the end of the new strand.
Picture
. . . And then proceed as normal.
Picture
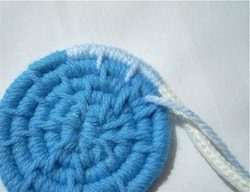
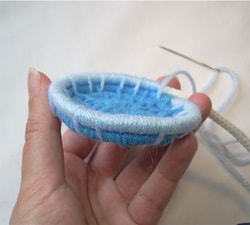
At some point, the base of your basket will be as large as you want it, and it will be time to build the walls of your basket. So as you coil, you’ll begin positioning the new coil above the old one, instead of next to it.
Picture
  • You can adjust the shape with your fingers as you coil, too. So this image shows the beginning of the walls. From here, you just keep coiling and shaping.

  • When you’re ready to end your basket, you’d cut the end of the clothesline, tape it, and cut it on the diagonal. Then you can wrap and stitch this end down to the last coil of your basket.

Video Tutorial

Proudly powered by Weebly